Best Views, Gear Tips, and What to Expect
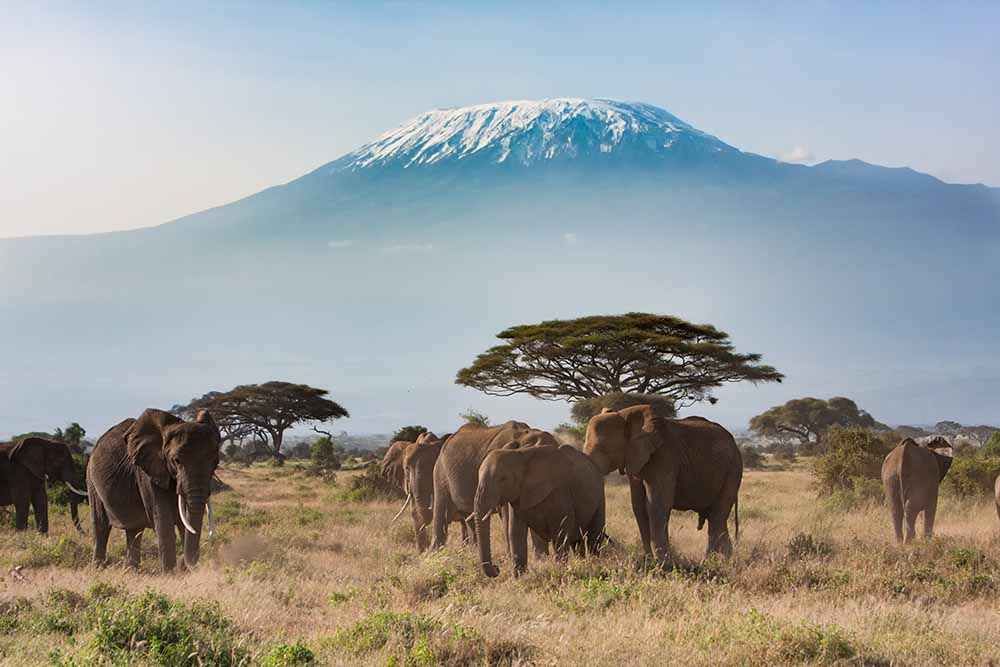
Photographing Mount Kilimanjaro is a dream for many landscape and adventure travelers. From lush rainforest trails and giant heathers to alpine desert, glaciers, summit signs, and wide-open views above the clouds, Kilimanjaro offers one of the most varied photographic journeys in Africa.
But great Kilimanjaro images do not happen by chance. The mountain brings rapidly changing weather, altitude, dust, rain, bright equatorial light, and freezing summit conditions. That means the best photographs usually come from travelers who arrive prepared — not only physically, but creatively and practically as well. Your original notes rightly emphasize that camera preparation, protection from weather, and thinking ahead about the kinds of images you want are all essential to success on the mountain.
Whether you are joining a Kilimanjaro day hike, a full summit climb, or simply want to improve your mountain photography, this guide will help you understand what to bring, how to protect your gear, and how to make the most of your time on the mountain.
Why Kilimanjaro Is So Special for Photography
Mount Kilimanjaro is not just one landscape. It is a progression of ecosystems and moods. In a single journey, you may move through:
- rainforest and moss-covered forest trails
- moorland with giant groundsels and heather
- rocky high-altitude landscapes
- glacier viewpoints and summit scenes
- sunrise or sunset light above cloud level
This variety is what makes Kilimanjaro such a rewarding subject for photographers. It is not only about reaching the top. It is also about documenting the transition, the scale, the atmosphere, and the experience of being on Africa’s highest mountain.
For some travelers, the best images come from the summit sign and glacier edges. For others, the most memorable photos come much earlier — in the forest, on the Shira Plateau, or when the mountain appears through clouds in soft morning light.
What Kind of Kilimanjaro Images Should You Aim For?
One of the best things you can do before a Kilimanjaro trip is decide what kind of photographs matter most to you. Your original draft touched on this idea of preparing intentionally, and that remains one of the strongest principles for success.
You may want to photograph:
- wide mountain landscapes
- dramatic summit scenes
- trekkers on the trail
- sunrise or sunset over the slopes
- glacial features and volcanic terrain
- details such as boots, trekking poles, frost, tents, and trail texture
- environmental portraits of hikers and guides
- storytelling sequences that show the climb from forest to high altitude
The stronger your visual intention, the more prepared you will be when conditions shift quickly.
Best Camera Gear for Kilimanjaro Photography
The core idea from your draft is still correct: bring equipment that gives you flexibility, but do not overcomplicate your kit. Too much gear adds weight, slows you down, and makes it easier to miss the moment.
A practical modern camera setup
For most travelers, a strong Kilimanjaro kit includes:
- one main camera body
- one versatile zoom lens
- one wider lens for landscape scenes
- spare batteries
- enough memory cards
- lens cloths
- weather protection
A good all-around combination might include:
- a 24–70mm or similar zoom for general use
- a 70–200mm or moderate telephoto for compression and distant detail
- a wider lens if you love dramatic landscapes and trail perspectives
You do not need to carry every lens you own. On Kilimanjaro, simplicity often works better than quantity.
Do you need a second body?
A second camera body can be very useful if:
- you want a backup in case of weather or failure
- you want to avoid changing lenses in dusty conditions
- you are serious about shooting different focal lengths quickly
For lighter travel, many hikers prefer one body and one versatile lens.
How to Protect Your Camera Gear on Kilimanjaro
This is one of the most important parts of Kilimanjaro photography, and your original notes were right to emphasize it. The mountain takes you from tropical moisture to freezing summit conditions, so camera care matters a lot.
Protect against rain and dust
Bring:
- waterproof dry bags or zip bags
- a rain cover for your camera or backpack
- sealed pouches for batteries and memory cards
- microfiber cloths for lens cleaning
Dust and moisture are often a bigger problem than people expect.
Protect against cold
Cold temperatures, especially on higher routes and summit attempts, can reduce battery life quickly. Keep batteries:
- in inner pockets close to your body
- warm when not in use
- rotated if one begins to weaken
A camera left exposed for too long in freezing wind can also become difficult to operate comfortably, especially near the summit. Your original notes emphasize keeping gear warm and ready before summit moments, and that is still excellent advice.
Keep gear accessible
Do not bury your camera at the bottom of your bag. If you have to stop, unzip, search, and change equipment, the moment may already be gone. Accessibility matters as much as protection.
Tips for Better Photos on Kilimanjaro
ravel with your shot in mind
Think before the trip about the images you most want to make. This helps you react more quickly when light and landscape align.
Keep your camera ready
The best trail moments often happen unexpectedly — a break in the cloud, a hiker on a ridgeline, a shaft of light in the forest. A ready camera is often the difference between seeing and capturing.
Use people for scale
Kilimanjaro is vast. Including trekkers, guides, or porters in the frame can make your images feel more human and dramatic.
Don’t focus only on the summit
Some of the strongest Kilimanjaro photographs are made lower down: in forest, moorland, camps, and transitional zones. The story of the climb is often more powerful than one single summit shot.
Respect the mountain rhythm
If you are on a full trek, altitude and fatigue are real. Photography should support the experience, not distract from safety and pacing.
Summit Photography: What to Expect
If you are doing a summit climb, conditions near the top are often cold, windy, and physically demanding. This means summit photography needs to be simple and efficient.
Before summit push:
- set your camera up in advance
- choose your main lens early
- keep batteries warm
- reduce the need for lens changes
- know what shots matter most to you
Your original draft made a very good point here: the summit is not the place to fumble with gear, swap lenses unnecessarily, or overcomplicate the process, In reality, some of the best summit images are often:
- quick portraits
- wide sign-and-glacier shots
- atmospheric scenes with light and cloud
- candid emotion after the climb
Explore Our Kilimanjaro Experiences
If you want to experience Kilimanjaro with more intention — whether on a scenic day hike or as part of a longer mountain journey — explore our Kilimanjaro day hikes and climbing experiences designed for strong guiding, beautiful scenery, and memorable storytelling moments.
You can also contact us for advice on:
- the best Kilimanjaro route for photography
- day hike vs multi-day climb
- what to pack for mountain photography
- how to combine Kilimanjaro with safari or cultural experiences
Our Photography Safaris